Isn’t there just something about curtains that makes a room feel complete?
They seem to bring it all together and really make a room feel so much more polished. Which is why for the past 5 months since we moved in (side note: five months already?!) I’ve been dying to get some curtains up in our living room.
I’m sure you can see where this is going – we FINALLY got curtains done for our living room and I am absolutely and completely, head-over-heels in love with them.
Before I show you, though, let’s get into some details. You may or may not have noticed, but the windows in our living room are absolutely giant.
Image may be NSFW.
Clik here to view.
We weren’t too concerned about getting enough fabric to completely close the curtains because we don’t plan on ever having these curtains closed. We love the light flowing into our house and we have some nice (faux) wooden blinds to give us some privacy, so we really just need the curtains to be pretty. The real problem came in finding a curtain rod. Not only are they incredibly expensive, it’s next to impossible to find one that’s long enough to cover our windows without paying a ridiculous amount of money.
So naturally, we did what we always do in these situations: we decided to make our own. I did a little research and quickly learned that there are not many people out there who have attempted to DIY curtain rods – and most of the people who have tried it have done something that isn’t really our style. So basically, we were on our own here.
After a little bit of research and a lot of browsing at Lowe’s, we ended up choosing to go with electrical conduit – it’s super cheap, comes in a variety of thicknesses, and has a nice, industrial look to it so we wouldn’t even have to do anything to the finish.
Image may be NSFW.
Clik here to view.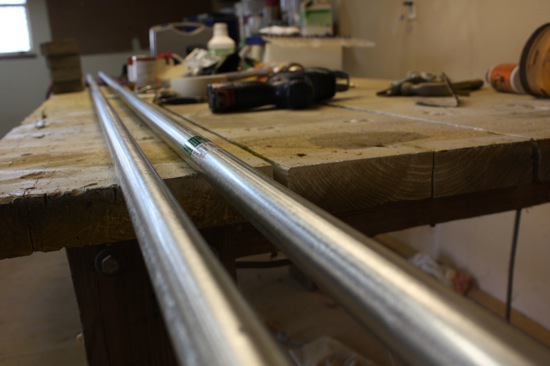
We also got a ton of random hardware from the electrical aisle that looked like it could be used for a curtain rod – things like two-hole straps, couplings, and knock out seals. No idea what those are? Yeah, me neither, but we’ll get to that in a minute.
Before I get started, I’ll warn you that this post might get a bit technical and tedious. I totally don’t blame you if you want to just scroll down to the bottom and look at the pretty pictures. But I want to get into the DIY details of how to actually do this for anyone who might be interested – we’re still in a bit of shock over how much money we saved by going this route, and we’re totally in love with the results, so I feel obligated to share how we did it!
Image may be NSFW.
Clik here to view.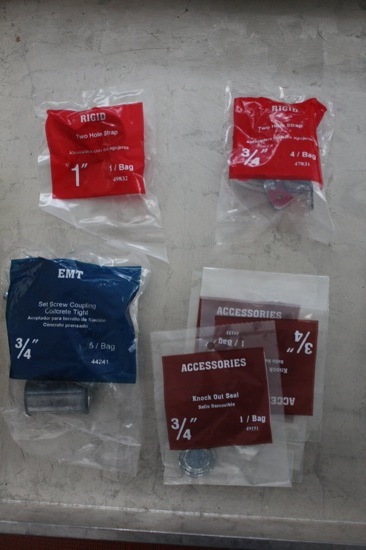
Okay, now let’s talk details.
We decided to purchase 3/4″ conduit because it was just the one we liked best. They had 1/2″ and 1″ as well, so you could really go with whatever size you prefer – just make sure all of the hardware matches your size and you’re good to go.
After measuring the windows (plus adding on some length on either end so we could hang the curtains wider than the window, making it look even larger), we decided that we wanted 12 feet of curtain rod for the window behind our couch, and 8 feet for the front window.
Of course, conduit only comes in 10 feet lengths, so that meant we were going to have to do some cutting. We wanted the rods to be identical and it just so happened that our lengths worked out perfectly for us to just buy two lengths of conduit have a seam in the middle of each – we cut each one right at six feet, so we ended up with two six foot pieces and two four foot pieces.
Lowe’s couldn’t cut the conduit for us, but thankfully Corey just got a reciprocating saw for Christmas that came with a metal-cutting blade! They sell plenty of tools that can cut the conduit for you, but most of them will run you about $20 – which technically speaking, isn’t much at all. But since Corey had the saw already, we were able to just purchase a $1.67 hose clamp from the plumbing aisle to help keep the blade straight. You know we’re all about saving money!
This is the hose clamp on the conduit – we just measured the conduit at six feet, marked it with a Sharpie, and put the clamp on before cutting:
Image may be NSFW.
Clik here to view.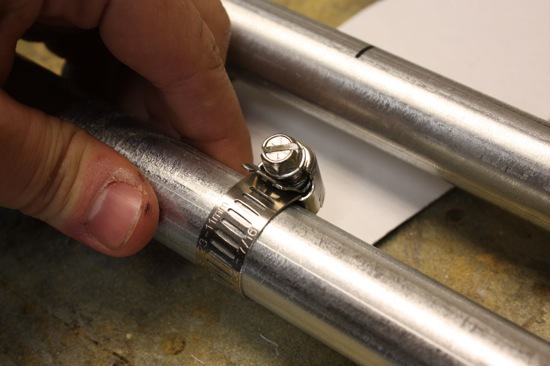
And after cutting we had this:
Image may be NSFW.
Clik here to view.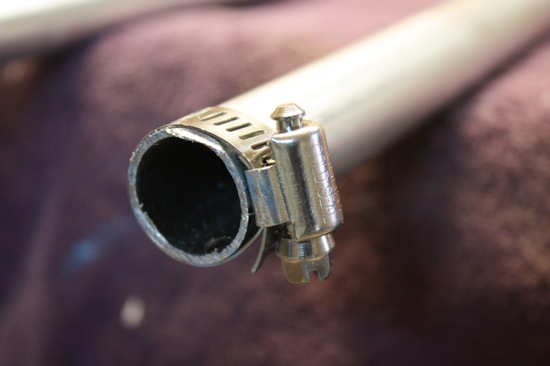
So now we had four pieces of conduit that needed to be pieced together to make an actual curtain rod. This is where the coupling comes in. Here’s what it looks like:
Image may be NSFW.
Clik here to view.
It’s insanely simple to put together. Just put one length of conduit in one end and tighten the screw, then do the same on the other side. And then, you have a curtain rod (almost)!
Image may be NSFW.
Clik here to view.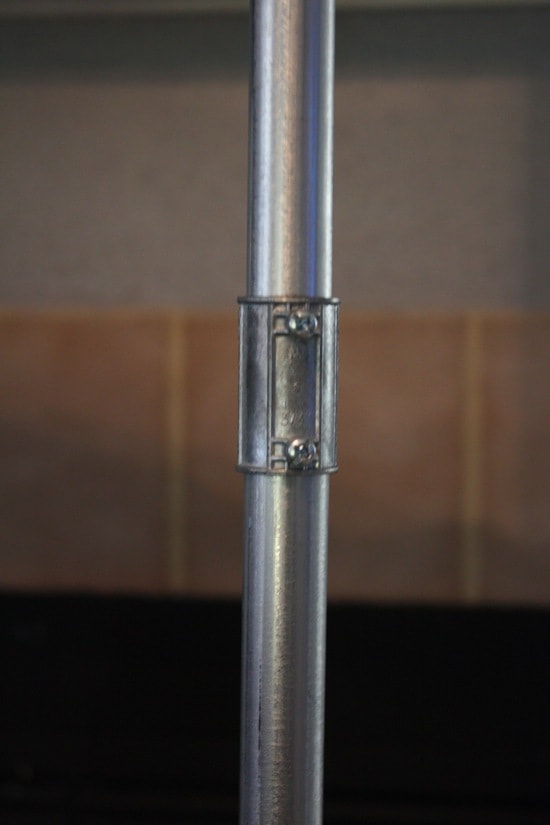
At this point, the only thing missing to make this look like a real curtain rod is finished ends. Because conduit is used to run electrical wires, it’s hollow in the middle and has holes at the ends – we wanted it to look a little more finished. We talked about actually getting finials for the ends, but we couldn’t find any that we liked (or that were cheap enough for our “keep the price as low as possible” budget). So, we found some caps for the end (they’re technically called knock out seals) and plopped them in.
Image may be NSFW.
Clik here to view.
The only weird thing to keep in mind about the knock out seals is that you have to get a size smaller than your conduit in order for them to fit. I’m not an electrician so I can’t explain why (and I’m sure these things aren’t really even intended for what we did with them), but all I know is we had to buy 1/2″ knock out seals to fit into our 3/4″ conduit.
We’re really glad we went with these rather than an actual finial – you can barely even see them once the curtain rod is hung – it just looks nice and finished. And extremely simple, which is exactly what we were going for.
At this point, we were finally ready to hang them. We wanted to hang ‘em high and wide to maximize the visual size of the windows. It sounds like a silly concept, but this little graphic is my favorite way to show how big of a difference it can make:
Image may be NSFW.
Clik here to view.
(Source)
We measured and marked a spot for the rod based on how long our curtains + curtain hooks were (we’ll get to that in a minute) and I climbed up on the stepladder to hold it in place and make sure we were happy with the location and the way it looked.
Image may be NSFW.
Clik here to view.
Once we were sure we liked how it would look, it was time to hang it! One thing to keep in mind if you tackle something like this is to make sure you put your curtain rings on the rod before hanging it – the rod sits very close to the wall and can’t be taken out nearly as easily as traditional rods, so you’ll want to have the rings already on it and ready to go as soon as you’re done hanging it!
To get our curtain rod on the wall, we used two-hole straps. I have no idea what they actually are, but they look like this:
Image may be NSFW.
Clik here to view.
(Sorry, I forgot to snap a photo before we actually got them on the wall)
An important thing to remember here is that you’ll need two straps in the same size as your conduit, and one that is a size larger (so, for example, we used two 3/4″ and one 1″ strap on each curtain rod). The reason for this is that you have the coupling in the middle of the rod, which adds some bulk to the middle section, meaning you’ll need a bigger sized strap.
From here on out, it’s just about measuring, screwing in the straps, and hanging the curtain rod!
We ended up using curtain rings with clips to hang the actual curtains – I wasn’t about to actually sew grommets into the curtains, and this was the easiest (and cheapest) alternative. We picked them up at Ikea, and while they aren’t nearly as nice as some of the alternatives that they have at Lowe’s, they were much more affordable!
Image may be NSFW.
Clik here to view.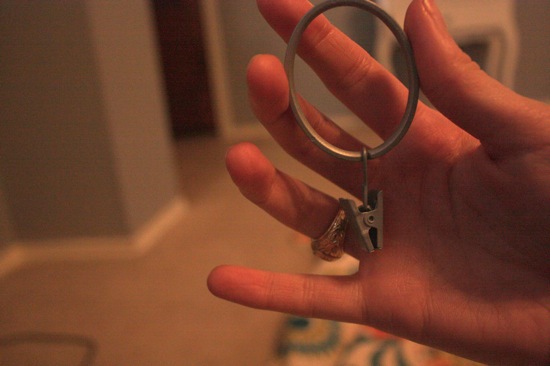
Okay, so we’ve chatted about building and hanging the rod and how to hang the curtains. I’m assuming you’d like to see what the curtains actually look like now, right?
We chose the fabric for our curtains several months ago, but seeing the full panels of fabric (rather than just a tiny swatch) in my house was beyond exciting – and a little terrifying. It’s an incredibly bold pattern and combination of colors, which is more than a little intimidating.
Image may be NSFW.
Clik here to view.
But I had spent several hours cutting, ironing, and sewing all that fabric into curtains, so I wasn’t about to back down at this point.
Thank goodness we fell in love once they were up on the wall.
Image may be NSFW.
Clik here to view.
Image may be NSFW.
Clik here to view.
Image may be NSFW.
Clik here to view.
We’re pretty blown away by how much they bring all of the colors in our living room together. The orange ottoman fits in beautifully with them, and they add some (MUCH needed) pattern and fun to the room.
I’m obsessed.
We’re also really happy with how the rods turned out – they have a little bit of an industrial feel, but mostly, they’re just incredibly simple and fade into the background, allowing the curtains to be the star of the show.
Image may be NSFW.
Clik here to view.
Image may be NSFW.
Clik here to view.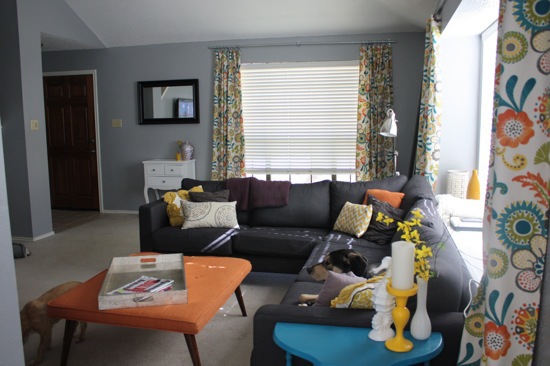
Image may be NSFW.
Clik here to view.
Yup, I think I like ‘em. Of course, now that they’re in there, I have a few things about the room I’d like to change. Specifically the turquoise side table next to the couch. It’s adorable and the perfect size for the space, but I feel like the turquoise is a bit much right next to the crazy-colorful curtains and the orange ottoman. But, as usual, we’ll just take it one step at a time and see what we think after we’ve lived with it in the room for a while.
And now that I’ve rambled on for over 1,500 words about our curtain rods (whoops!), let’s chat about what this actually cost us.
- (2) 10-foot, 3/4″ lengths of conduit: $3.29/each
- (2) 1″ two-hole strap: $0.70/each
- (1) 4-pack of 3/4″ two-hole straps: $0.80
- (1) 2-pack of 3/4″ hose clamps: $1.67
- (1) 5-pack of 3/4″ couplings: $3.36
- (4) 1/2″ knock out seals: $0.35/each
TOTAL for the curtain rods: $15.21
Add in four 10-packs of IKEA curtain rings at $2.99 each, that brings our total to $27.17 for the entire project (not including fabric for the curtains, obviously).
I’d say that’s pretty good, considering the cheapest curtain rod we could find in the size we needed was over $50 (for just one rod!), and it didn’t include curtain rings!
And I might be slightly biased, but I think our under-twenty-dollars curtain rod looks way better than any of the options we could find in stores.
Image may be NSFW.
Clik here to view.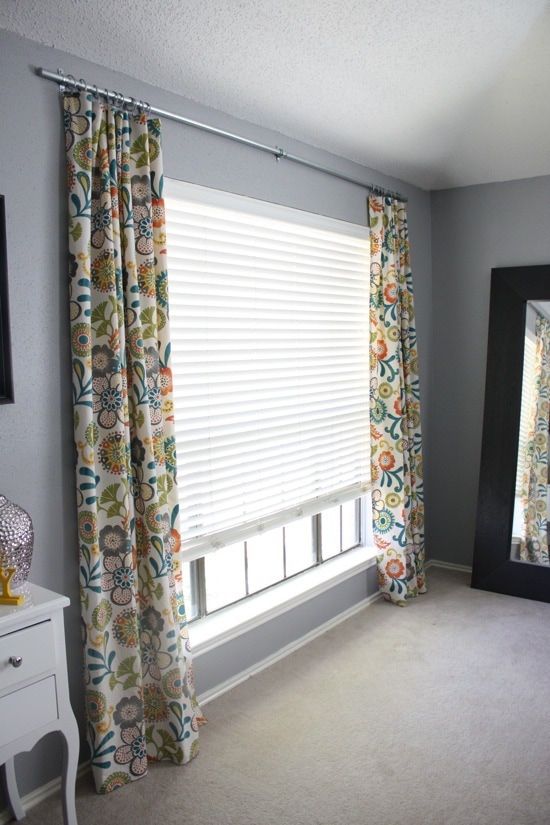
So, what’s your take on curtain rods? Do you like them streamlined and simple like us, or do you prefer something a bit more ornate? More importantly, how do you feel about curtains? Do you go for bold and eye-catching, or do you keep ‘em neutral?